
Grafana access management: How to use teams for seamless user and permission management
If you’re looking to simplify user access and permissions in your Grafana instance, then this blog post is for you.That’s because we’re going to walk through how to set up a streamlined system for managing user permissions with Grafana teams.
We’ll focus on Entra ID (formerly Azure Active Directory) as our user repository and identity provider, but these steps can be adapted to other identity providers as well, including Okta and Keycloak.
The features discussed in this post are available in every Grafana Cloud plan (including our forever-free tier) and Grafana Enterprise. And ultimately, our goal will be to default to isolation while maintaining the ability to add optional sharing. We’ll cover how to:
- Establish a direct link: Synchronize your existing user directory with Grafana, automatically populating teams within the platform.
- Map teams to resources: Effortlessly map Grafana teams to dedicated folders, ensuring each team has a workspace for their dashboards and resources.
Why we recommend teams over organizations and custom roles
While Grafana offers various organizational structures (e.g. teams, organizations, custom roles), at Grafana Labs we advocate for using teams for multiple reasons.
Organizations offer rigid isolation, which can often lead to data silos and hinder collaboration and transparency, especially in environments with overlapping projects and team structures.
Custom roles, while flexible in defining permissions, can become complex to manage and may still fall short in fostering the level of collaboration needed in dynamic environments. They are best used for creating highly privileged users that do not have a shared domain with other users.
Teams, on the other hand, offer the right balance:
- Transparency and collaboration. Easily share dashboards and data between teams working on related projects.
- Controlled isolation. Restrict access to sensitive information, ensuring data security.
- Data source and other resource permissions. Allow teams to manage access to specific data sources, enhancing control without sacrificing collaboration.
- Label-based access control: Simplify and streamline permission management using labels, making it easier to maintain a secure and efficient environment.
To learn more about this topic, check out our blog post on using teams or organizations.
Configure your instance
Now that we’ve walked through why we think you should use this approach, let’s walk through how to actually implement it.
Map your users to ‘None’ role
When using Entra ID, assign all users to a “None” role. This will remove default access to every new dashboard and folder, so you can build users’ permissions from the ground up.
Note: When using other identity providers you can set the role attribute path to “None” to map every user to role None. Make sure to set up some extra rules for your admin users. For example, when using GitLab, follow the provided documentation.
Ensure external group synchronization is correctly configured
When using Entra ID, external group synchronization should work as is, without needing extra configuration.
Note: When using other identity providers, the single sign on documentation will help ensure group claims are present when logging in.
Check out our recent blog post about how to set up your SSO configuration for more information.
Create teams
Begin by creating your teams in Grafana. You can do this through the Grafana UI, the public API, or Terraform.
Note: We recommend using Terraform, as it enables easy state management and scalability for your setup. However, this represents a more advanced use case, so we’ll explore this option more at the end of this post.

Under Administration > Users and access > Teams, you can select the New team button, there you will be presented with the Team’s name choice and role picker. The name you choose is used solely for display, so be as descriptive as possible.
Through the role picker you can assign your team some basic functionality in the form of roles, such as the Datasource Explorer role, allowing team members to access the Explore menu to iterate on their queries.
Synchronize team members
External group synchronization is a feature that maps an identity provider group to a Grafana team.
Upon login, a user gets assigned to the teams they belong to based on their identity provider group memberships. At the same time, users will be removed from the teams no longer mapped to them.
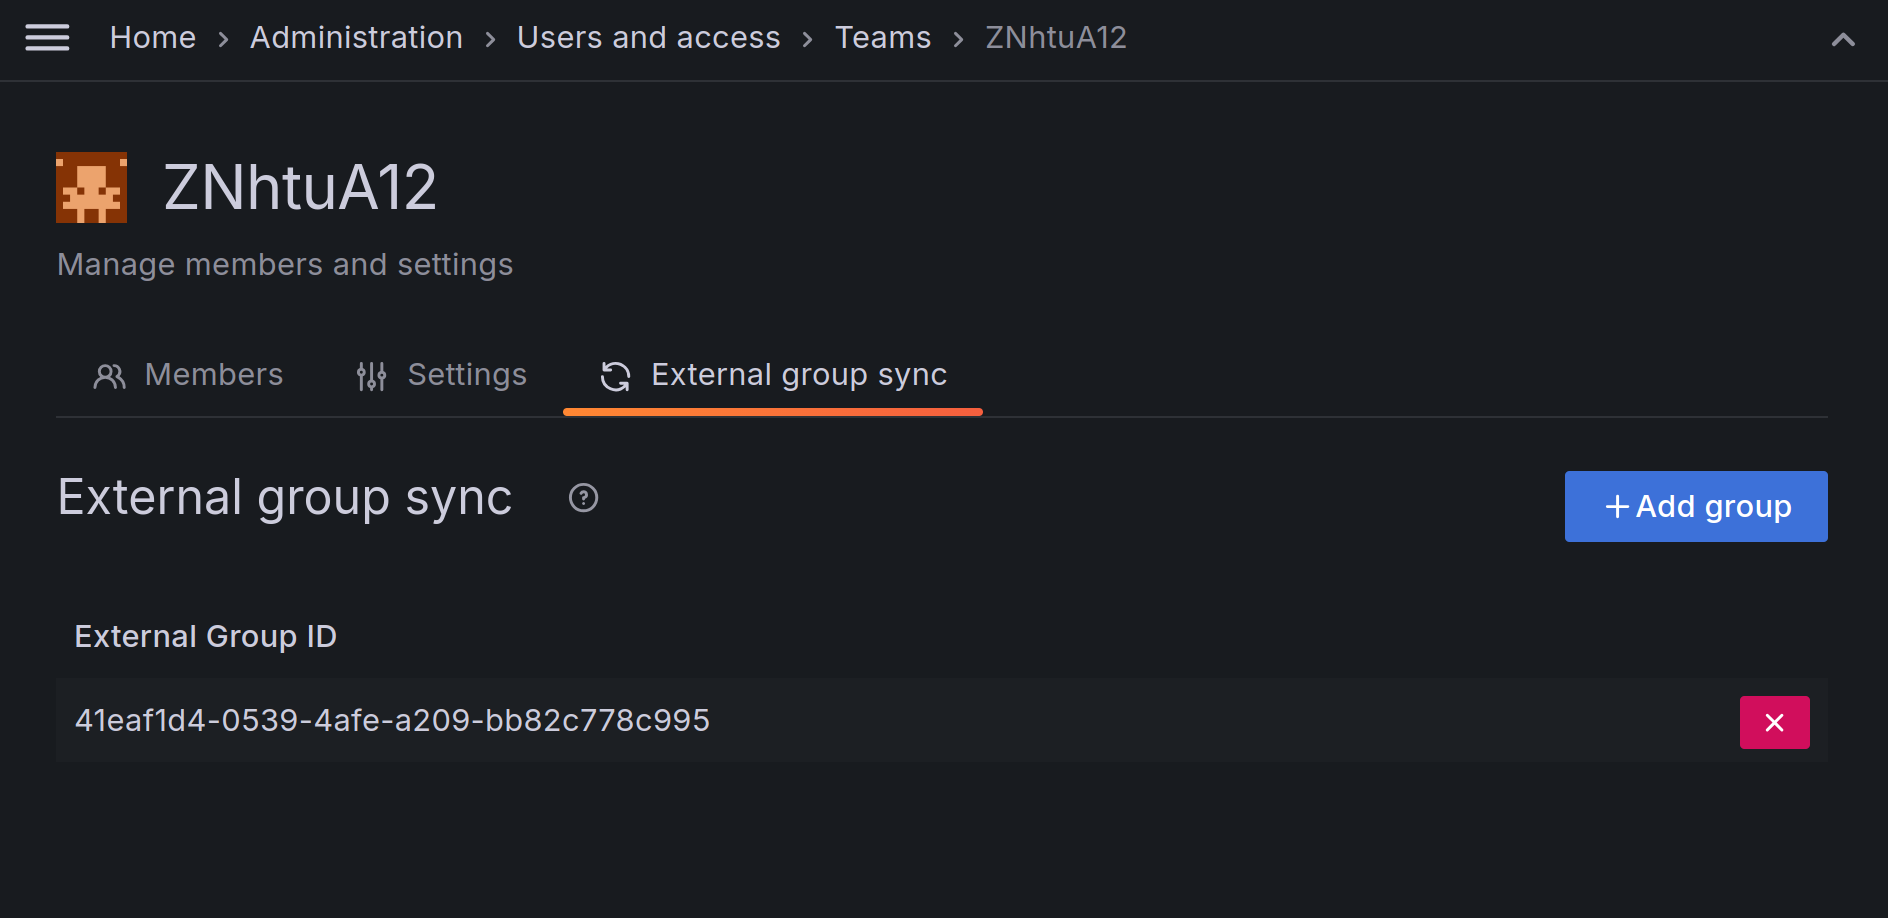
The “External group sync” tab in every team’s detail page allows you to add and remove new mappings for that specific team.
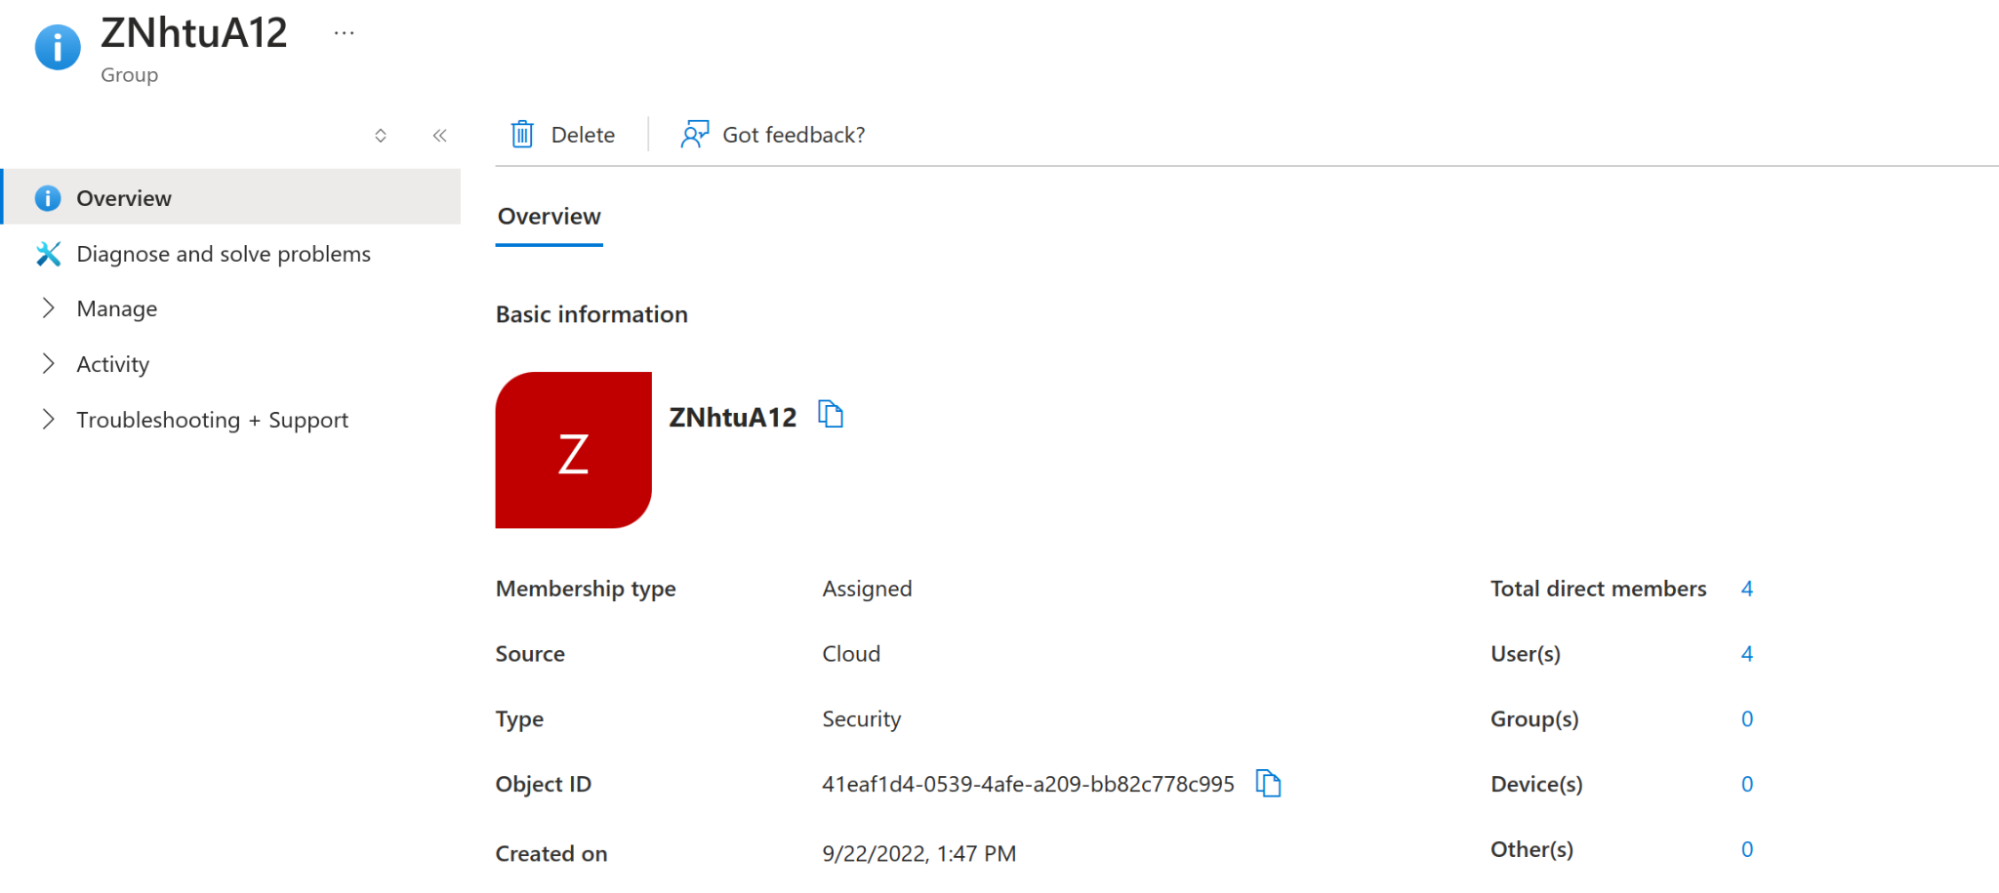
In the case of Entra ID, the team’s External Group ID must match the Object ID in the Entra interface.
Note: Team members are only automatically assigned and removed from their mapped groups on login. Syncing will not happen if the user does not log in.
Folders allow a team to have a place to store their projects and collaborate while being able to optionally share other content with the rest of the organization.
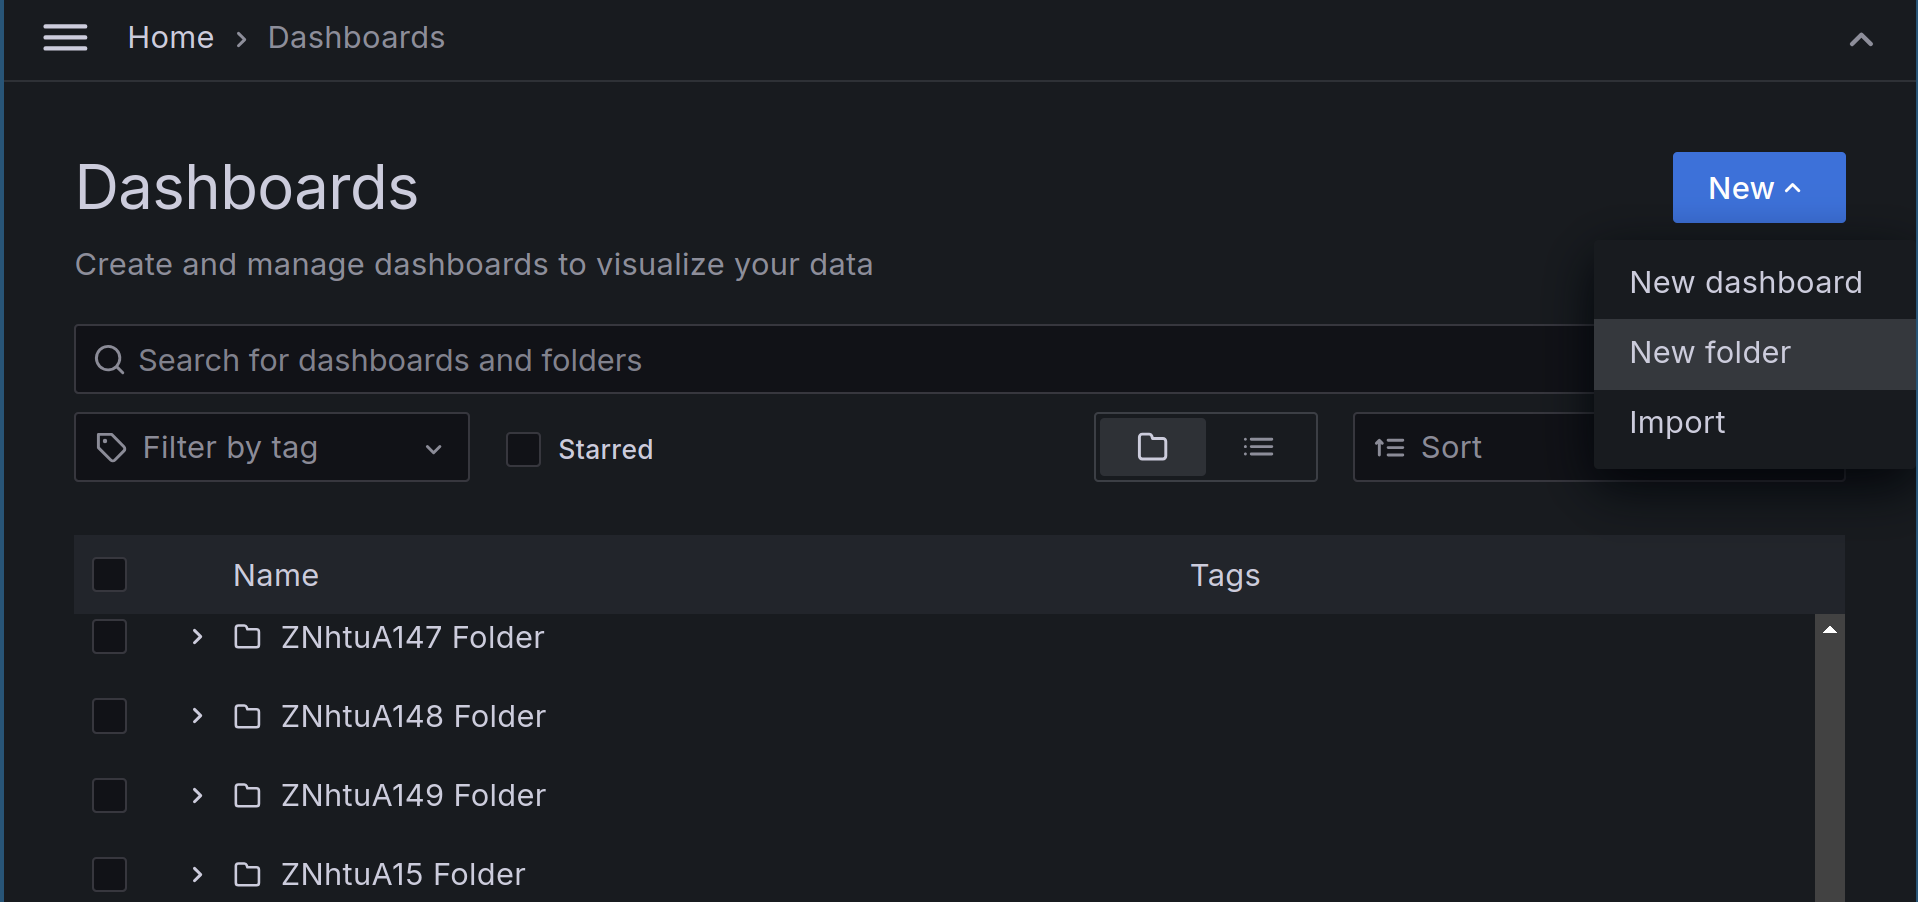
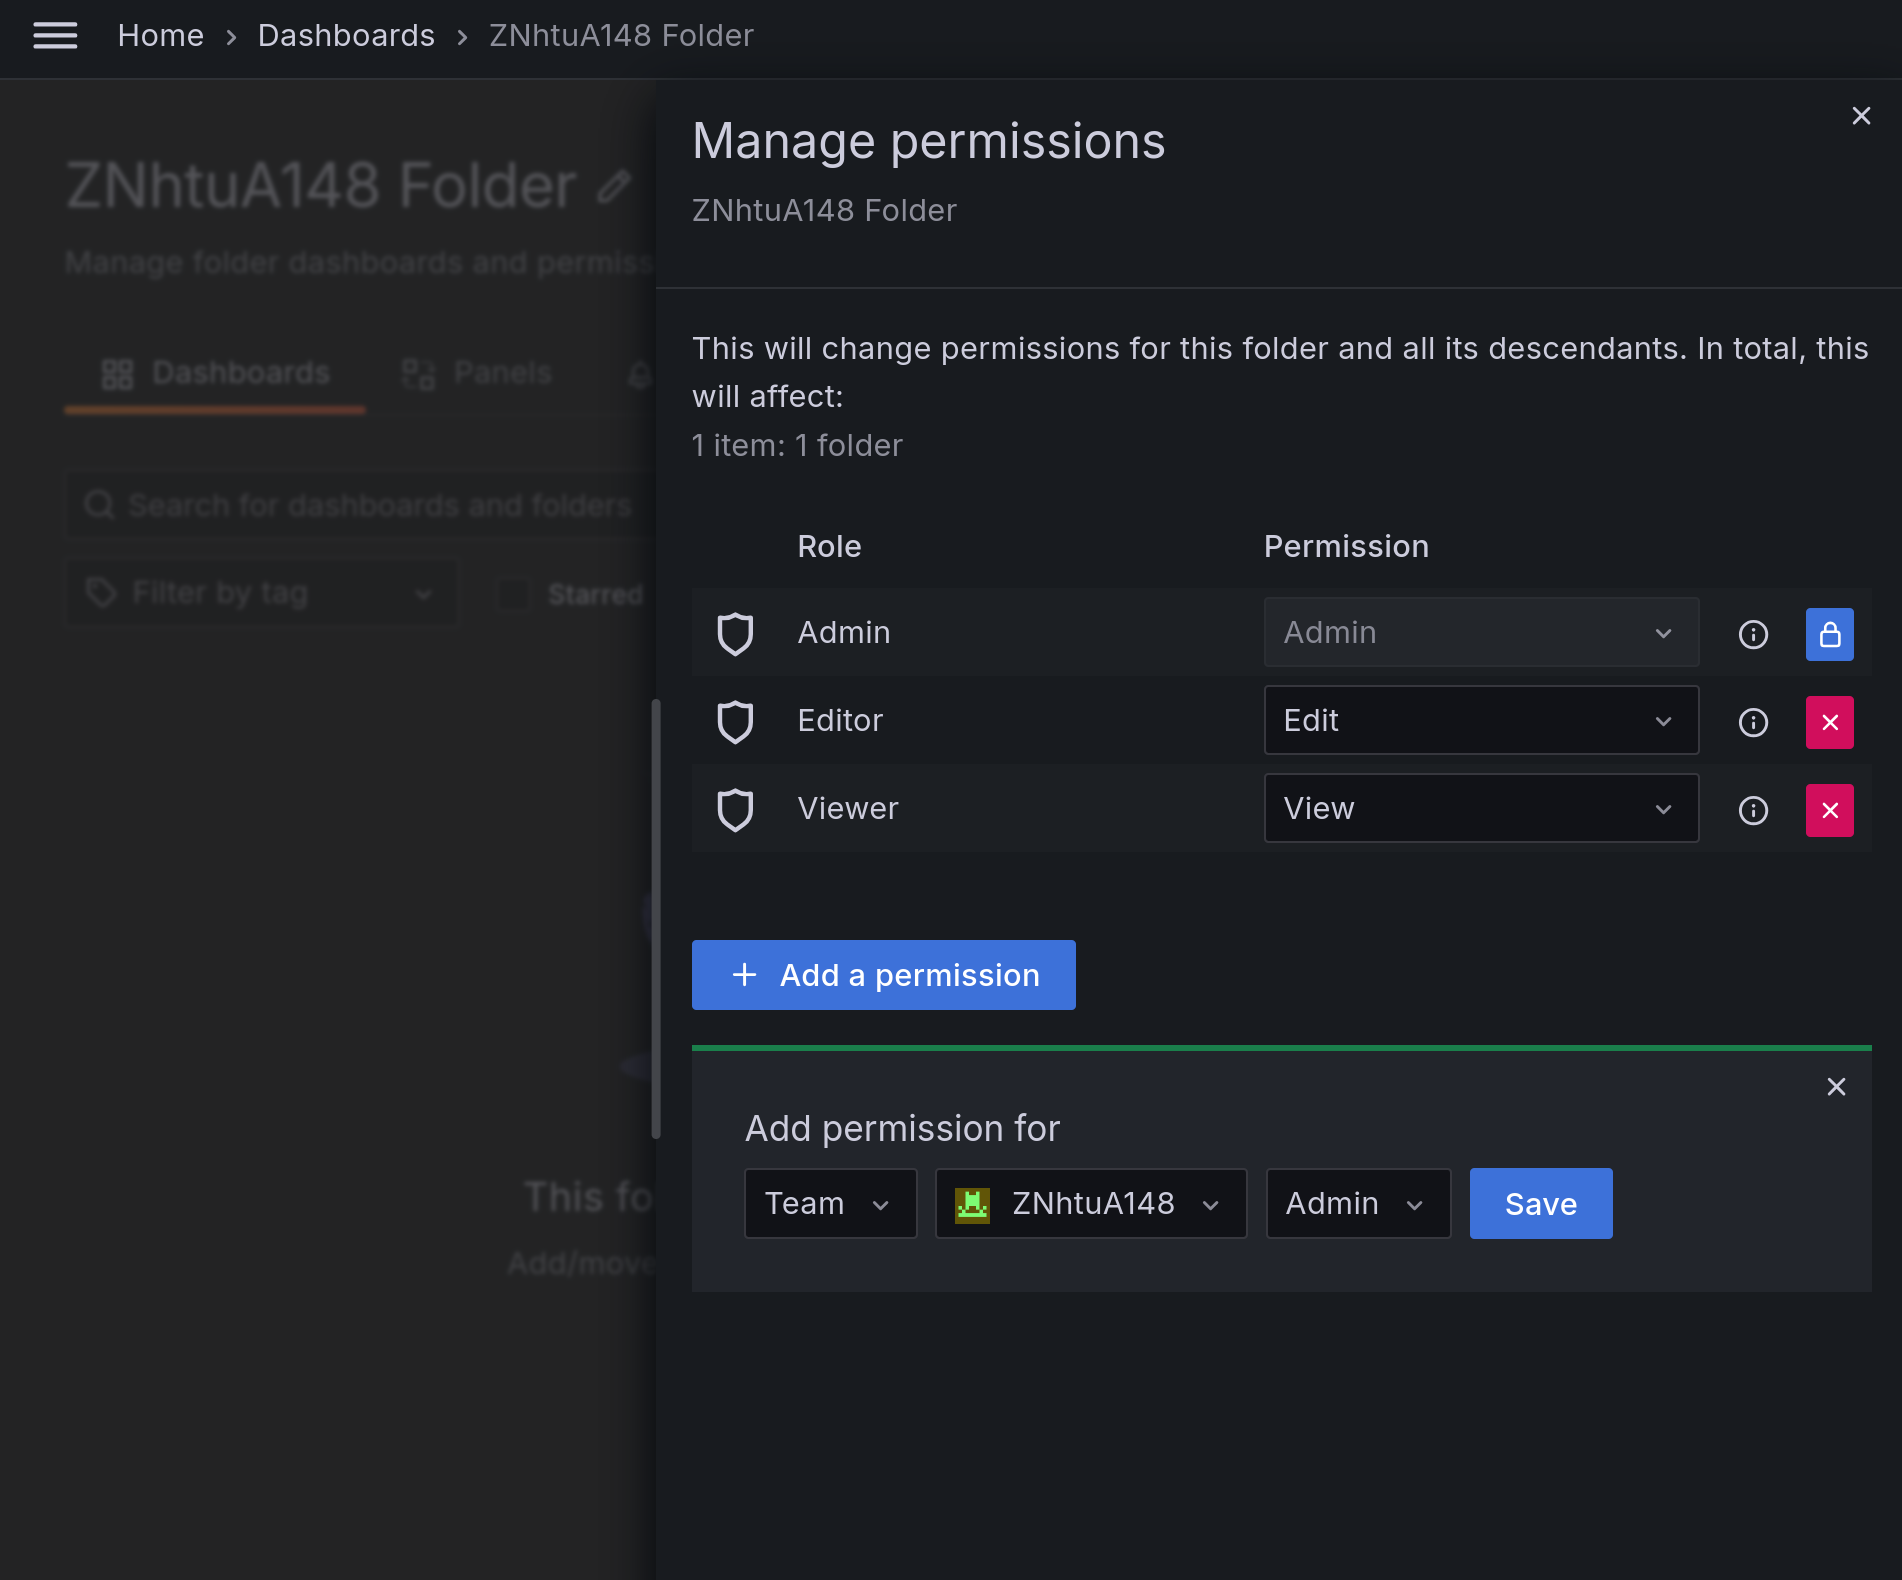
To create a team folder, create a folder in the dashboards view, then head on over to the permissions tab of your newly created folder. There you can add a new “Admin” permission to your team and, optionally, remove existing permissions.
Adding Admin permissions will allow your team, with users whose basic role is None, to create new dashboards and resources in the folder, while not exposing them to all of the organization’s folders and dashboards.
Removing the existing permissions will make this folder only accessible to your team instead of the original folder creator and anyone with basic Viewer and Editor roles. It is not possible to remove Admin access from folders, so you should be mindful when assigning this basic role.
Connect your team to data sources
Don’t forget to give teams access to the data sources they will be using; go to the permissions tab of your data source and add the “Query” permission to the team. You can also remove existing permissions from Editors and Viewers to make this a team-exclusive data source.

How to conquer access management at scale
By leveraging Terraform for Grafana configuration, you can ensure consistent, version-controlled, and easily reproducible setups across different environments. This approach significantly reduces manual configuration errors and streamlines the management of your Grafana resources.
A sample setup for a team would look something like this:
# Provider Configuration
terraform {
 required_providers {
   grafana = {
     source  = "grafana/grafana"
     version = "~> 3.4.0" # Use the latest version available
   }
 }
}

provider "grafana" {
 url  = "http://grafana.example.com" # Replace with your Grafana URL
 auth = "your-grafana-service-account-token"       # Insecure: prefer using a terraform variable
}

# Grafana Team
resource "grafana_team" "my_team" {
 name = "My Team"
}

# External Group Mapping
resource "grafana_team_external_group" "my_team_group" {
 team_id = grafana_team.my_team.id
 groups  = ["input-your-group-here"]
}

# Folder
resource "grafana_folder" "my_folder" {
 title = "My Folder"
}

# Folder Permissions
resource "grafana_folder_permission" "my_folder_permission" {
 folder_uid = grafana_folder.my_folder.uid
 permissions {
   team_id    = grafana_team.my_team.id
   permission = "Admin"
 }
}

# Prometheus Data Source
resource "grafana_data_source" "prometheus" {
 type = "prometheus"
 name = "Prometheus"

 # Add any necessary configuration for your Prometheus data source
 json_data_encoded = jsonencode({
   httpMethod = "POST"
   # Add other necessary configurations
 })
}

# Data Source Permissions
resource "grafana_data_source_permission" "prometheus_permissions" {
 datasource_uid = grafana_data_source.prometheus.uid
 permissions {
   team_id    = grafana_team.my_team.id
   permission = "Query"
 }
}
What does this configuration do?
- Provider setup: Configures the Grafana provider with the necessary URL and authentication.
- Team creation: Creates a new team in Grafana.
- External group mapping: Maps an external group to the created team, which is useful for syncing with external authentication systems.
- Folder management: Creates a new folder and sets admin permissions for the team.
- Data source configuration: Sets up a Prometheus data source and grants query permissions to the team. Part of the configuration was reduced for sample purposes, so check out the resource documentation for more information.
Key points and warnings
- Authentication header security: The configuration uses a service account token for authentication. Never hardcode this key in your Terraform files. Use variables and store sensitive information securely.
- Version control: While it’s great to version control your Terraform configs, be cautious about committing files with sensitive information to your repository.
- State file management: Terraform state files contain sensitive information. Use remote state storage with proper access controls.
- Testing: Always test your Terraform configurations in a non-production environment first.
- Grafana version compatibility: Ensure that the Grafana provider version is compatible with your Grafana instance.
- Resource Naming: Use a consistent naming convention for your resources to maintain clarity as your configuration grows.
Best practices
- Use variables for customizable values like team names, folder names, and external group identifiers.
- Implement a modular structure for more complex setups, separating concerns into different Terraform modules.
- Use data sources to reference existing Grafana resources when necessary, rather than always creating new ones.
Going further with Terraform
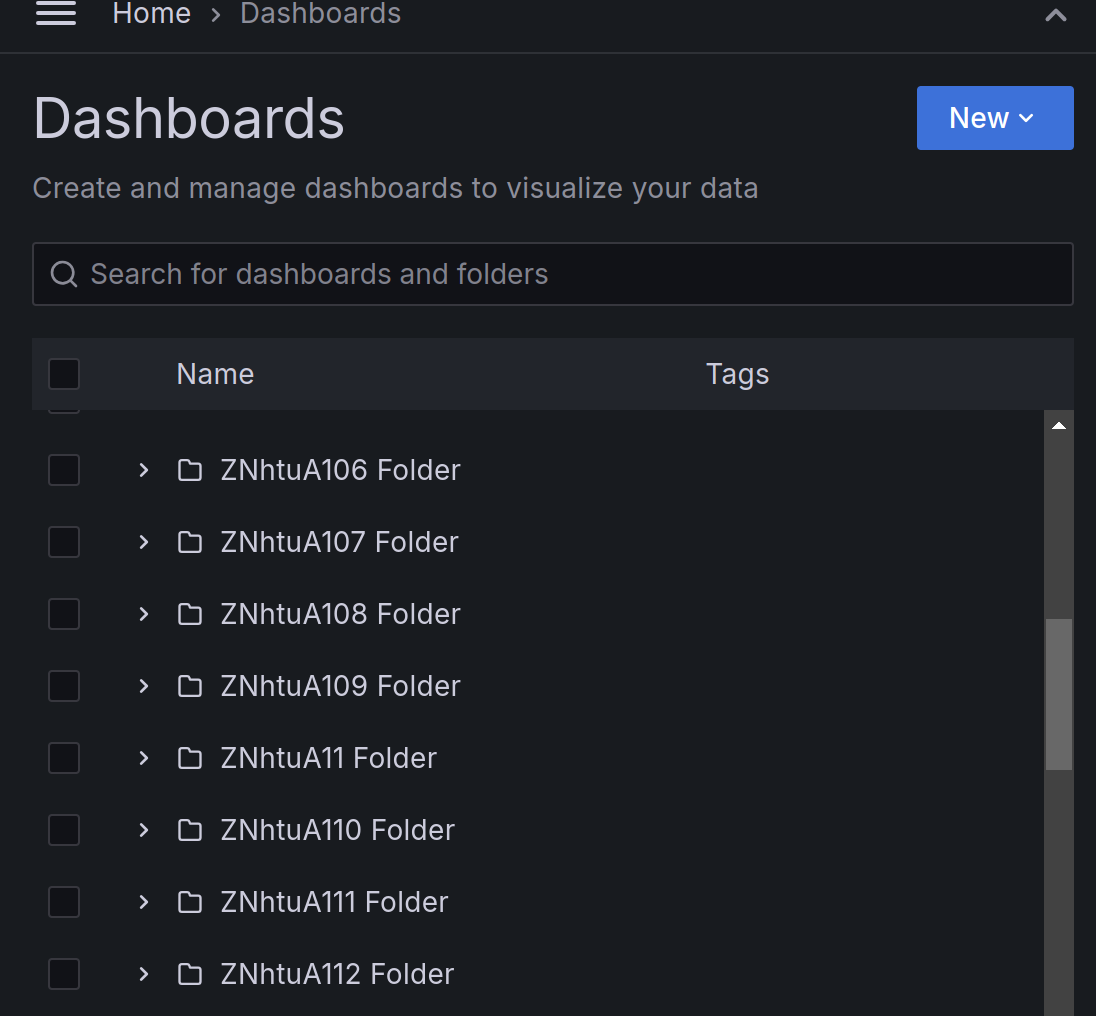
To give you a quick start on this and give you a more step-by-step approach, we’ve created a Terraform working directory generator that sets up a Terraform working directory, mapping all of your Entra ID groups to Grafana teams, with team folders and team synchronization pre-configured.
Visit the GitHub repo for more detail on how to use this tool to automate your setup:
Looking ahead: A future of fine-grained resource management
We are committed to constantly improving the way users organize and manage resources in Grafana. Expect to see advancements like:
- More resources in folders: Expanding folder capabilities to accommodate a wider range of resources beyond dashboards and alerts.
- Advanced team permissions: Providing granular permission controls for teams, giving administrators greater flexibility in managing access.
- Streamlined IdP integration: Further simplifying the synchronization process between your SSO provider and Grafana teams with features such as SCIM.
We are incredibly excited about the future of access control in Grafana and how these improvements will empower teams to collaborate effectively while maintaining a secure and well-structured data environment. And if you have any feedback, please feel free to share it in our issue tracker in GitHub.
Grafana Cloud is the easiest way to get started with metrics, logs, traces, dashboards, and more. We have a generous forever-free tier and plans for every use case. Sign up for free now!


